Kryptex x Gminer ASIC Firmware: Boost Your Mining Income
18/02/2026
If your ASIC is running on stock firmware, you are not squeezing 100% out of it.
Default settings don’t unlock your miner’s full potential — no auto-tuning, no overclocking profiles, no thermal protection.
Kryptex × GMiner firmware changes that. Intelligent auto-tuning, overclocking profiles, real-time chip monitoring, and flexible fan control — everything you need to maximize mining income from your hardware.
This guide walks you through flashing your ASIC step by step, setting up pool connection, and getting started with Kryptex.
Kryptex × GMiner firmware adds:
- auto-tuning and overclocking profiles;
- automatic profile switching based on temperature;
- real-time chip monitoring and recovery;
- automatic and manual fan control.
Preparing for flashing
- Check if your ASIC is supported in the compatibility list.
- Your PC must be connected to the same network as the ASIC.
- If the device is running third‑party firmware (VNISH, MSK MINER, LUXOR, HIVE, etc.), you need to restore the original Bitmain firmware before installing Kryptex × Gminer. Make sure you use a version released before March 2024 — starting from March 8, 2024, Bitmain added protection that blocks third‑party firmware installation. You can download the official Bitmain firmware from their website: https://shop.bitmain.com/support/download.
Installing Kryptex × GMiner Firmware
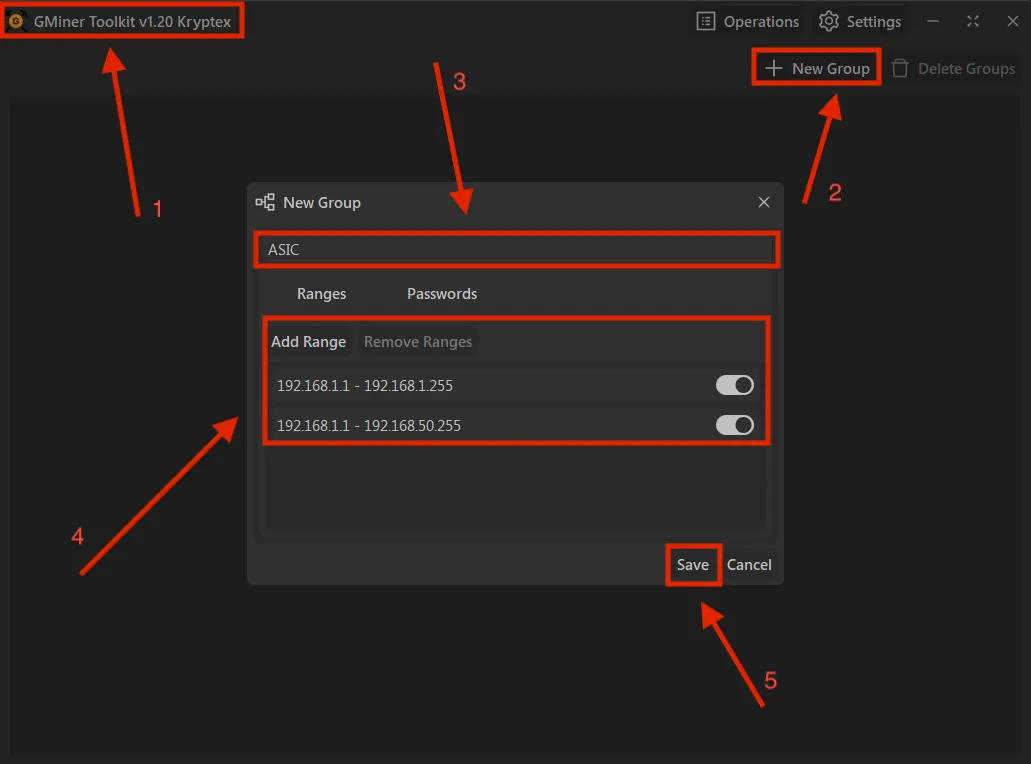
Open Toolkit → click “New Group” → enter the group name and the local IP address range → click “Save”
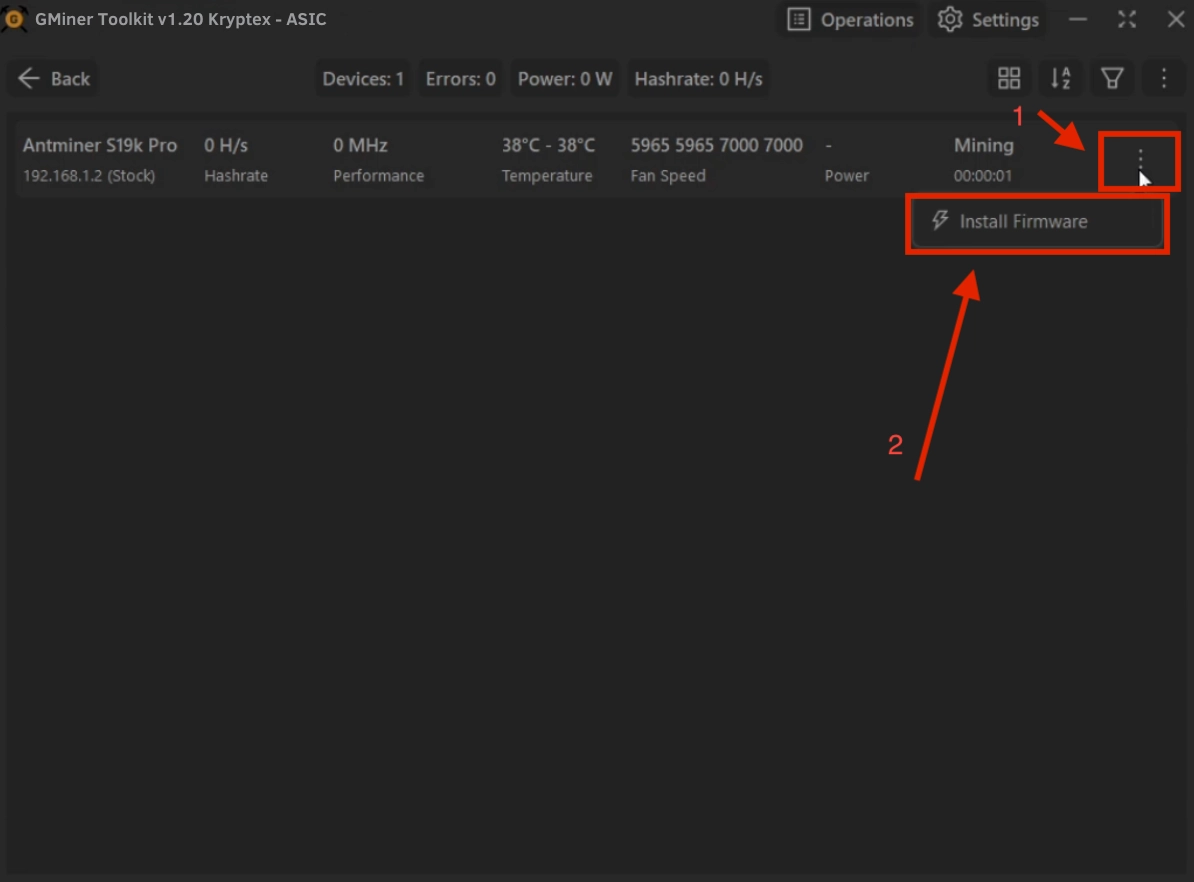
Select new group, choose your ASIC from the list, and click “Install Firmware”
Wait for the installation to finish, then click “Done”
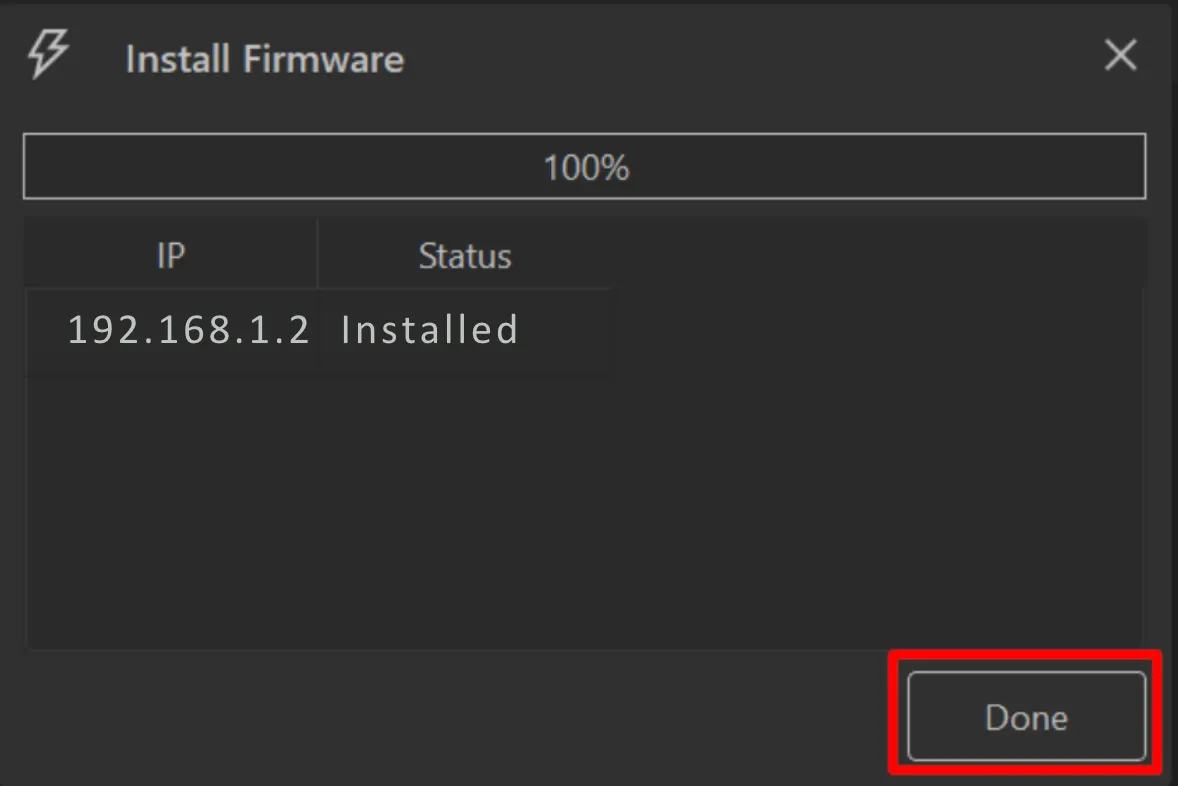
That’s it — the firmware is installed, and your miner will reboot automatically.
Something went wrong?
If your ASIC freezes, stops responding, or doesn’t work, you can reset it to factory settings.
- On the top panel, where the two LEDs (green and red) are located, press and hold the button for 7–20 seconds until the red indicator lights up. Within 5 minutes, the miner will be restored to factory settings and reboot automatically (no need to power it off).
- After your ASIC reboots, set up mining on the Kryptex pool — https://pool.kryptex.com
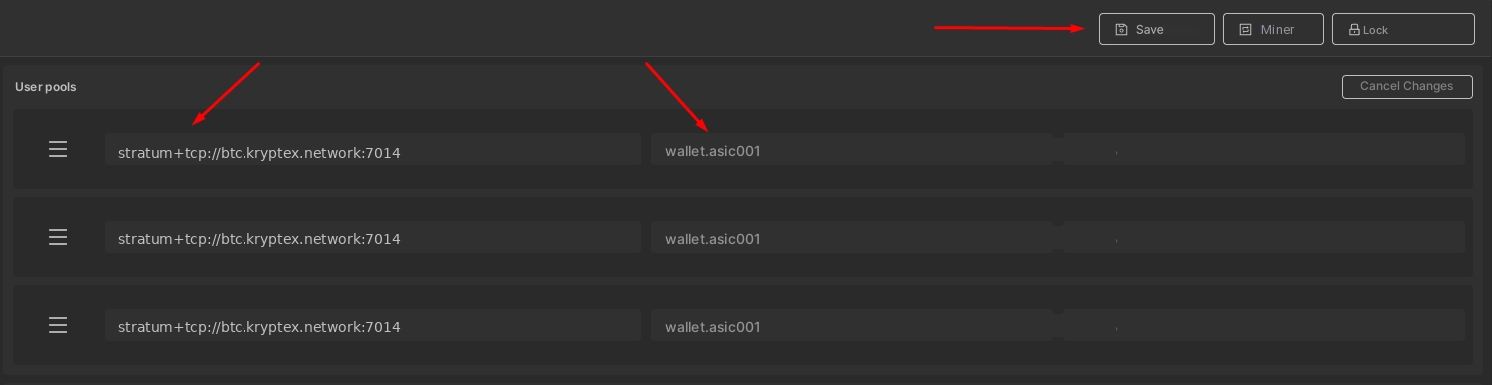
Pool Connection Settings
In the URL field, enter your mining pool address, for example:
stratum+tcp://btc.kryptex.network:7014In the User field, enter the worker in the format wallet.workername. Example:
wallet.asic001Click “Save”.
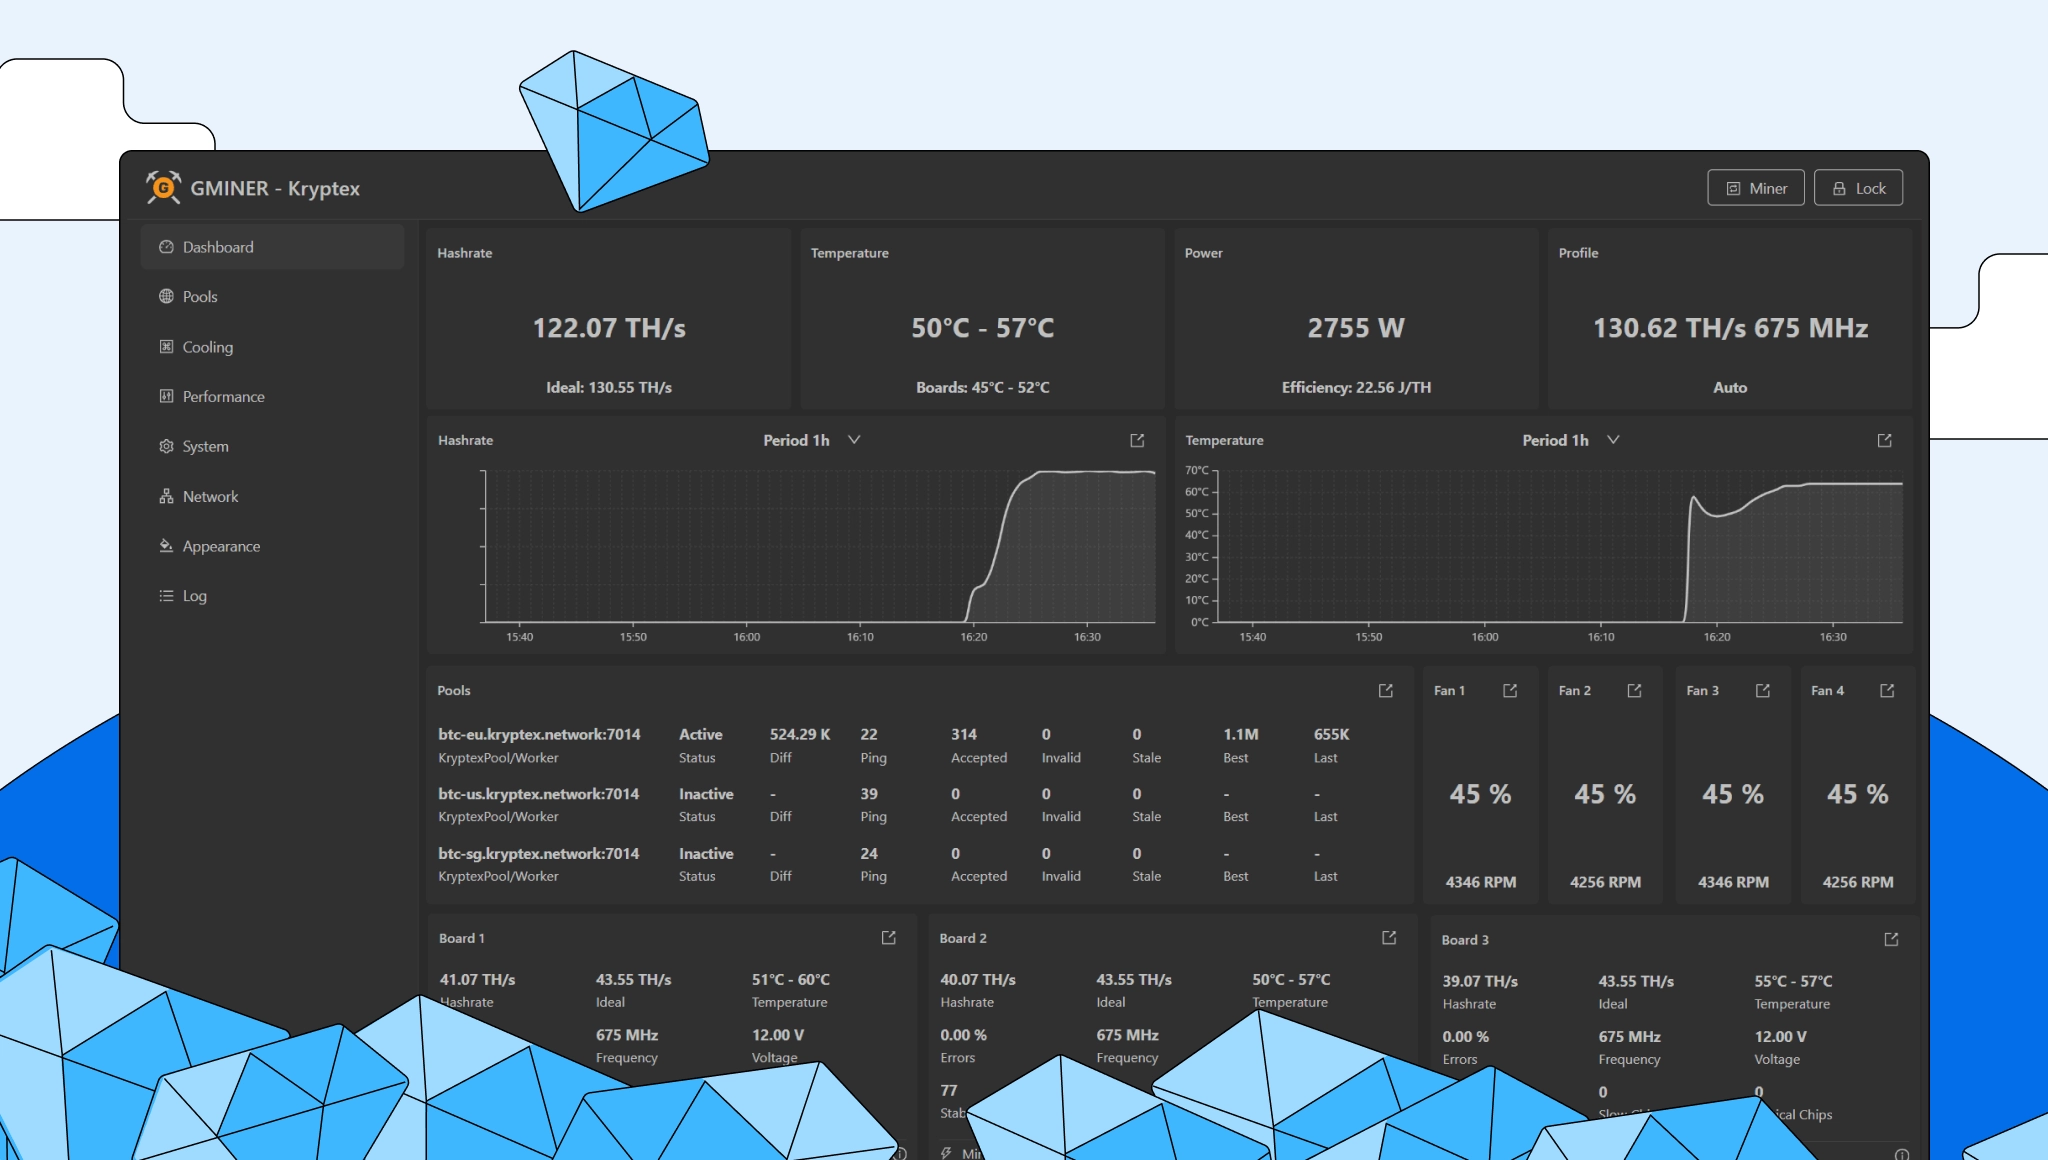
Kryptex × GMiner Features
The main page shows the device’s key metrics in real time.
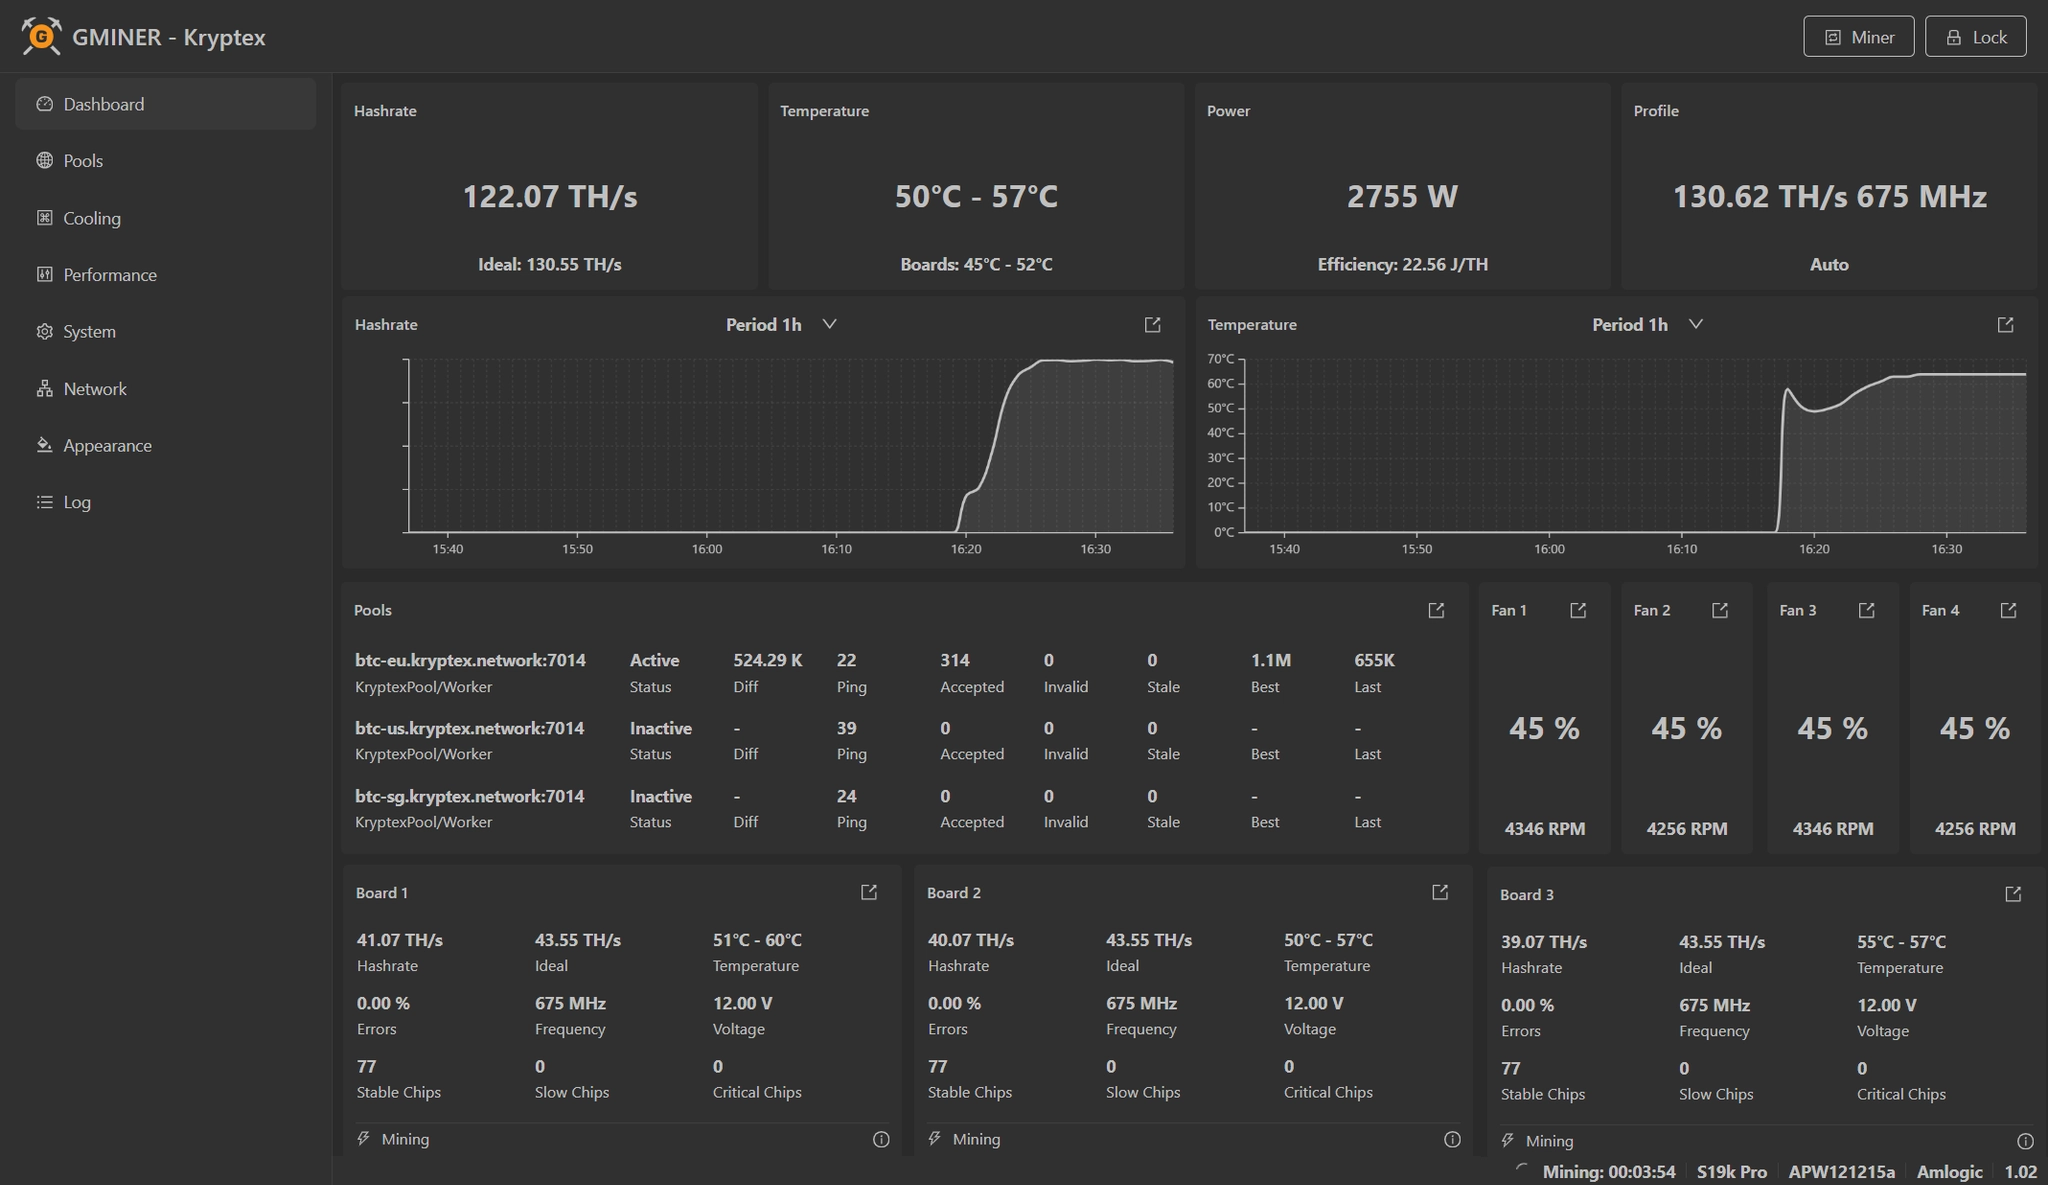
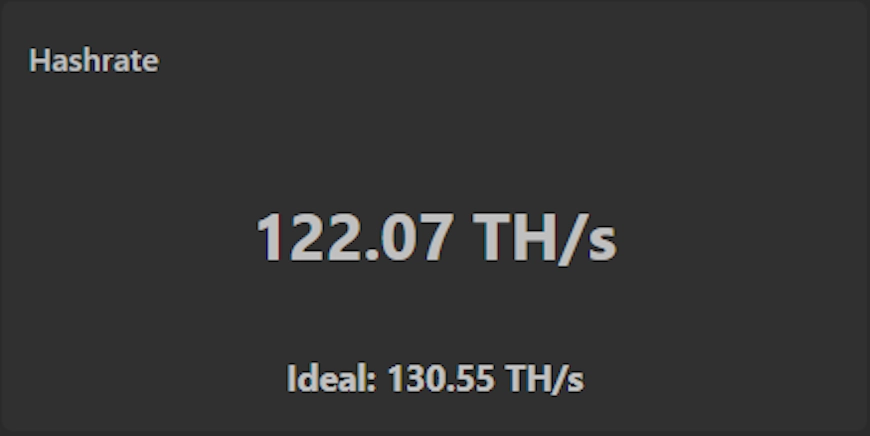
Current hashrate — shows the device’s performance.
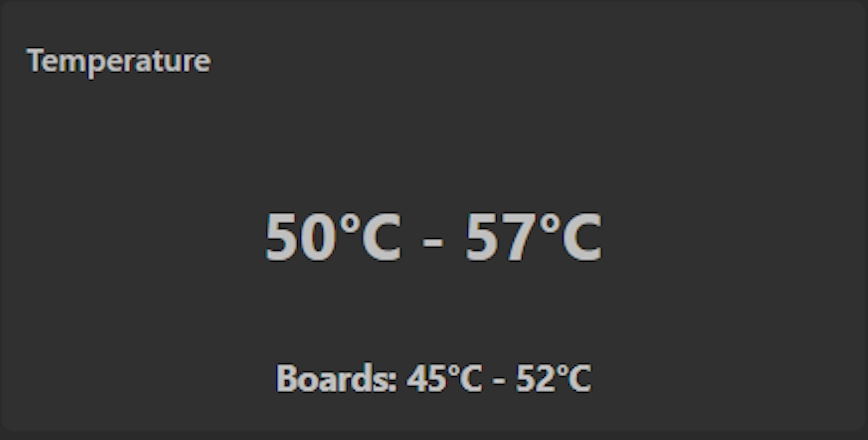
Temperature — shows the temperature of the chips and hashboards.
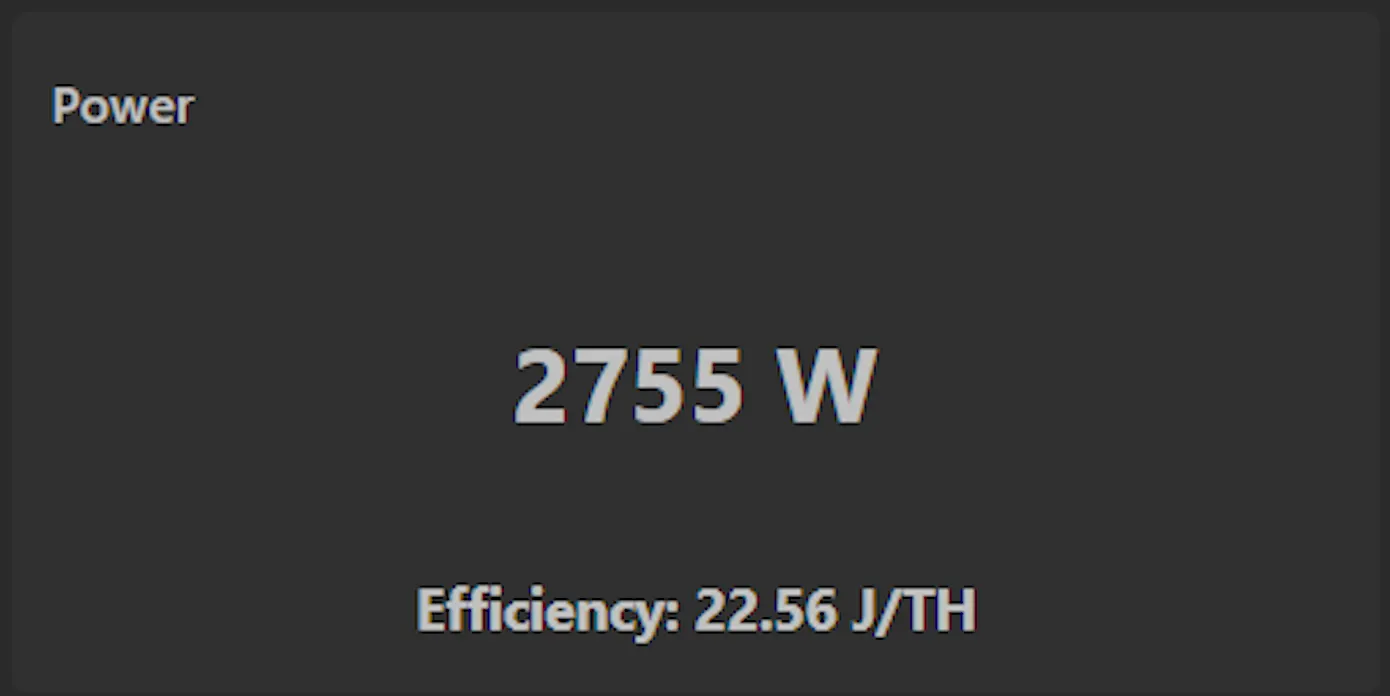
Power consumption — shows current power consumption and mining efficiency (J/TH).
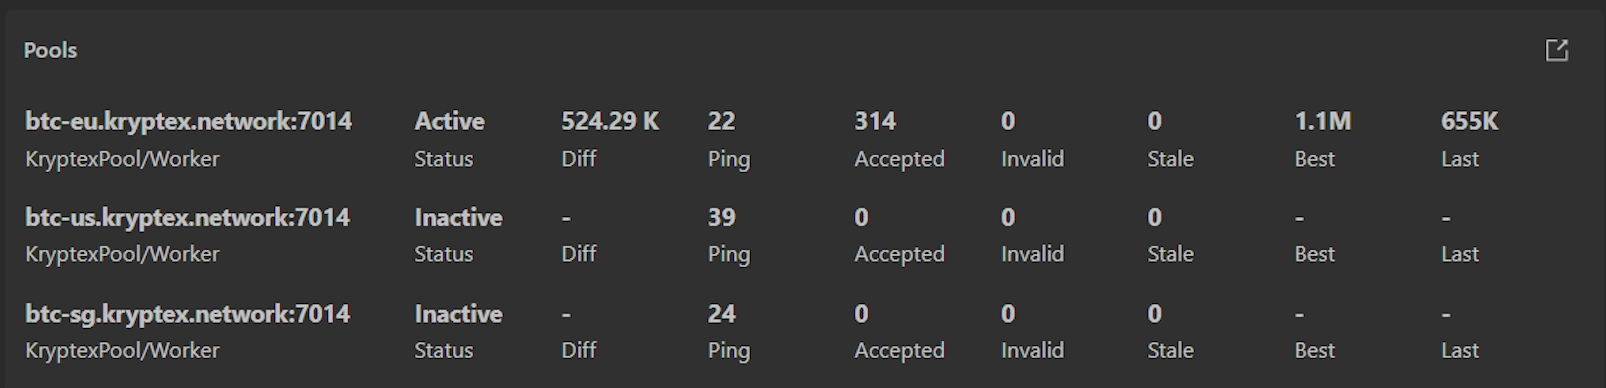
Pool status — shows connection to mining pools, ping and number of submitted shares.
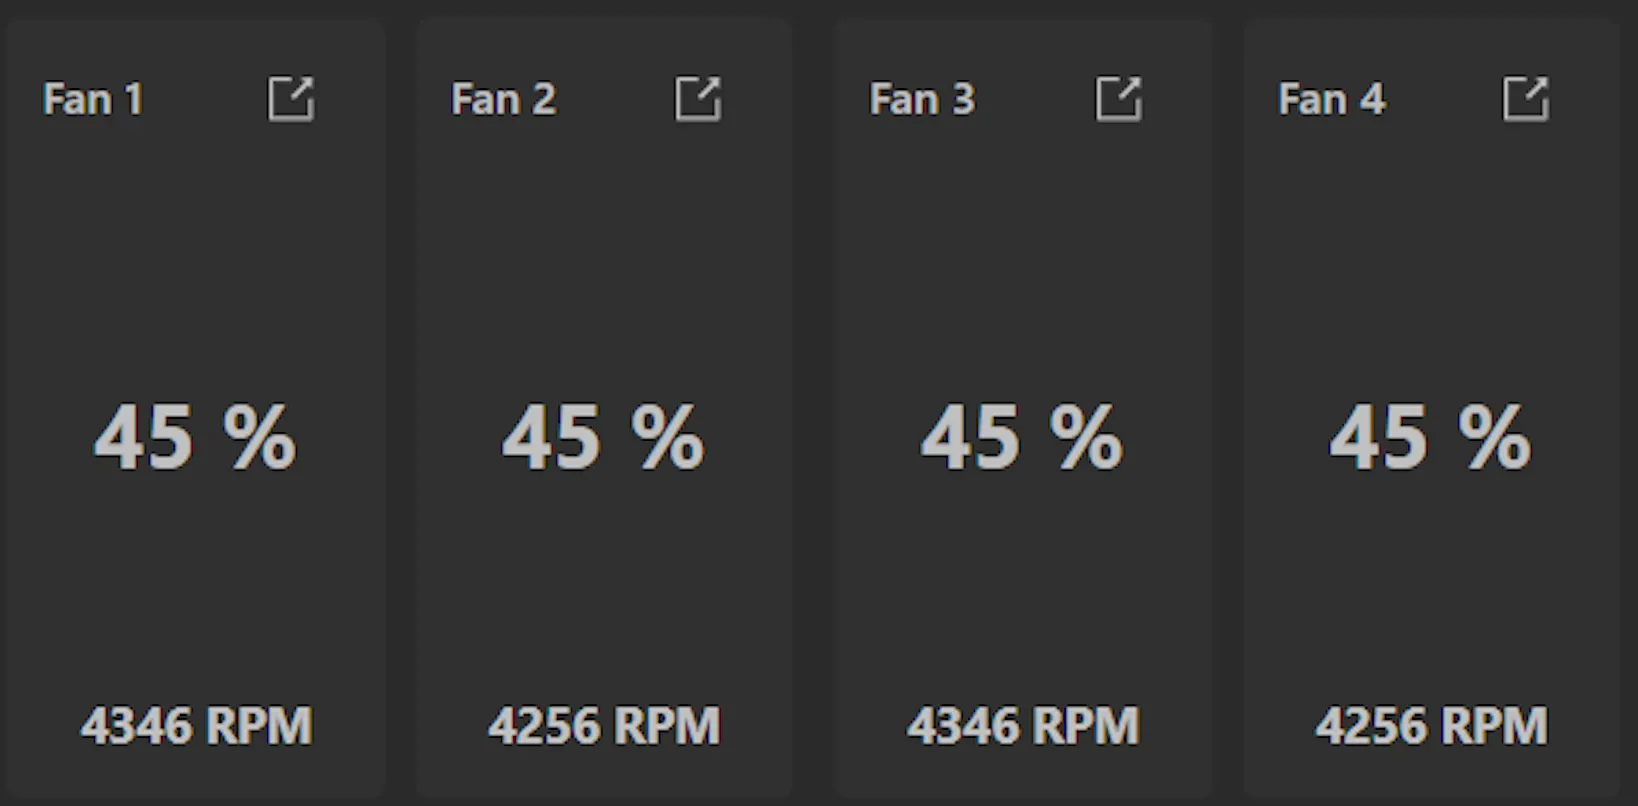
Fan information — displays number of connected fans, their rotation speed (RPM) and operating status.
Hash Board Widgets

Each widget shows:
- Hashrate and ideal hashrate (TH/s)
- Chip temperature (°C)
- Chip voltage (V)
- Chip frequency (MHz)
- Number of stable, slow and critical chips
Temperature control. In the Cooling section, you can set the ASIC’s target and maximum allowed temperature.
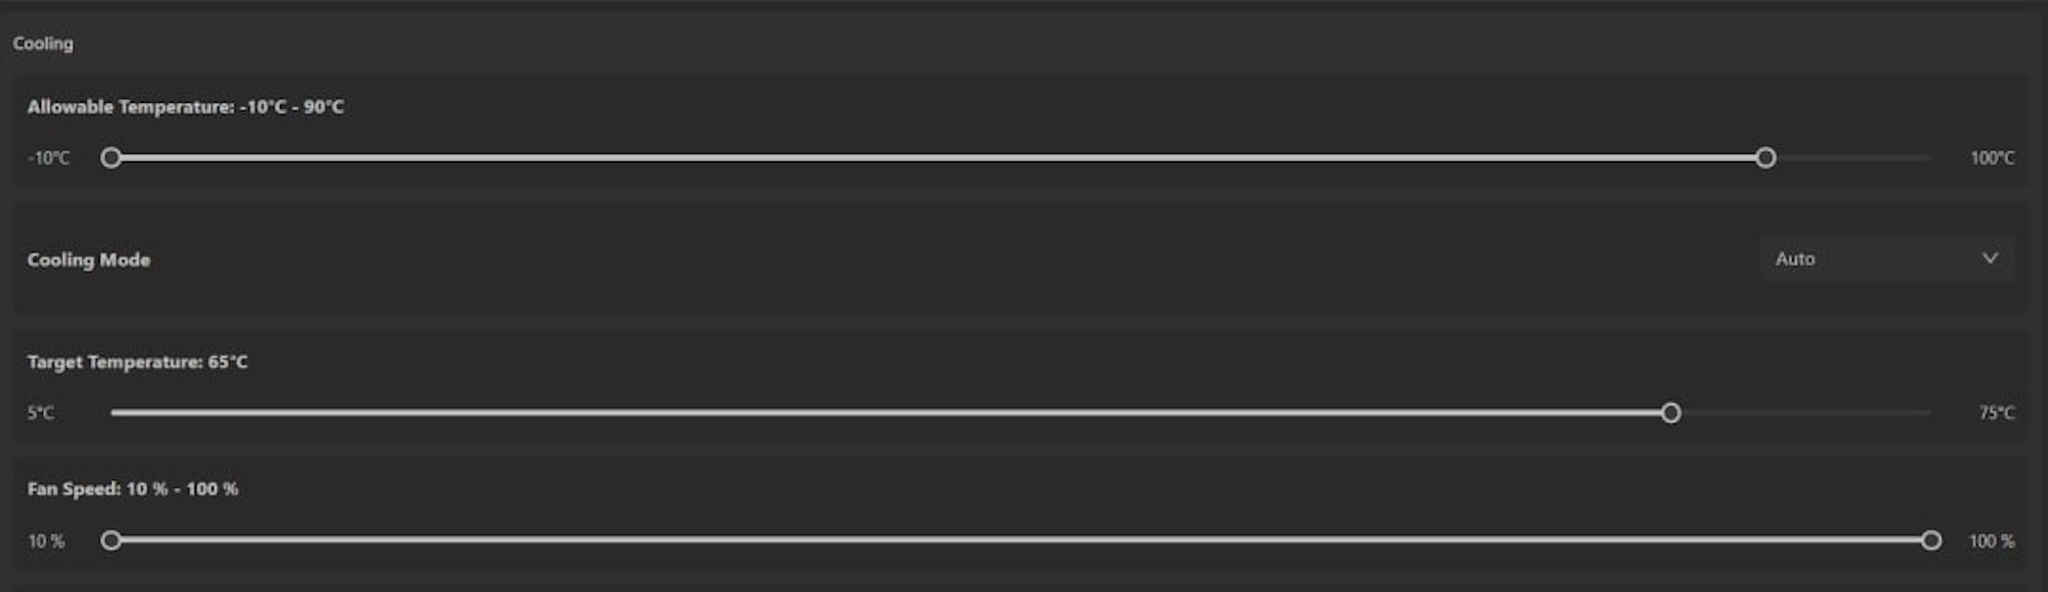
- Target Temperature — optimal temperature the system will strive for.
- Minimum Allowable Temperature — Lower temperature threshold for device operation.
Example: target — 65 °C(149 °F), max allowed — 90 °C(194 °F). When it reaches 90 °C(194 °F), the device will reboot.
Performance tuning
Open the “Performance” tab.
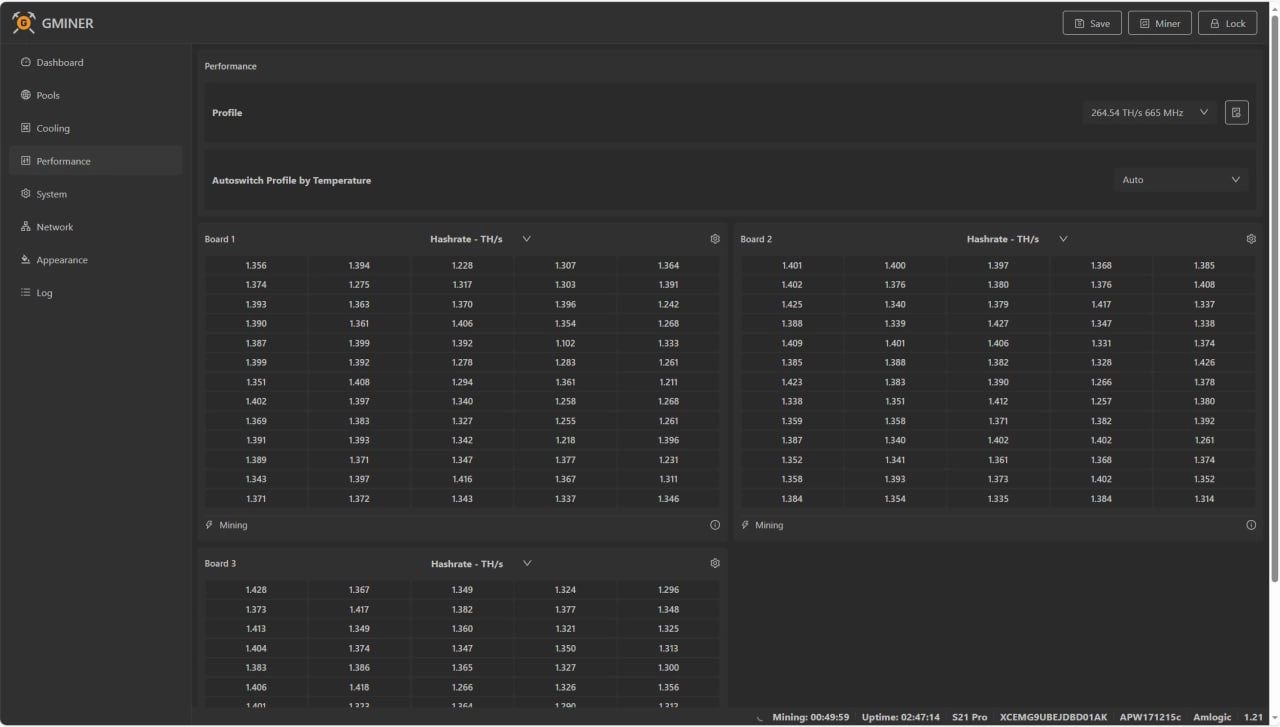
Select the overclocking profile from the list.

After a reboot, the device will always start with this profile. Advanced users can use Manual mode to set the temperatures at which the firmware increases or decreases the profile settings.
Need help?
Still have questions, something unclear, or can’t connect?
Contact support — we’ll be happy to help!
Email support: support@kryptex.com