How to Change DNS Server on PC, Router, and ASIC Miner: Step-by-Step Guide
29/01/2026
A DNS server translates website addresses into numbers that computers understand.
When you type a website address like pool.kryptex.com into your browser, DNS converts it into a set of numbers (IP address) so your browser can open the site. Changing DNS helps access blocked websites or resources, including mining-related ones.
You can change DNS in Windows, Linux, macOS, routers, or miners in just a few minutes. Configure your router once, and all devices on your network will automatically get the new DNS. Try different servers and pick the one that makes your internet faster.
Changing DNS isn't a magic pill! If a website won't open even by IP (IP-level blocking), changing DNS won't help — you'll need a VPN. If it opens by IP, it's DNS blocking, and changing DNS will solve the problem.
Which DNS Should You Choose? Testing Performance and Speed
You need two IP addresses: primary and secondary (also called preferred and alternate). Here's a list of the most popular DNS servers:
- Google Public DNS —
8.8.8.8|8.8.4.4 - Cloudflare —
1.1.1.1|1.0.0.1 - NextDNS —
45.90.28.208|45.90.30.208 - Yandex DNS —
77.88.8.8|77.88.8.1 - AdGuard DNS —
94.140.14.14|94.140.15.15 - OpenDNS —
208.67.222.222|208.67.220.220
How to Test DNS Before Changing Settings
Open Command Prompt (Win+R, type cmd and press Enter) or PowerShell, then run:
nslookup pool.kryptex.com 8.8.8.8
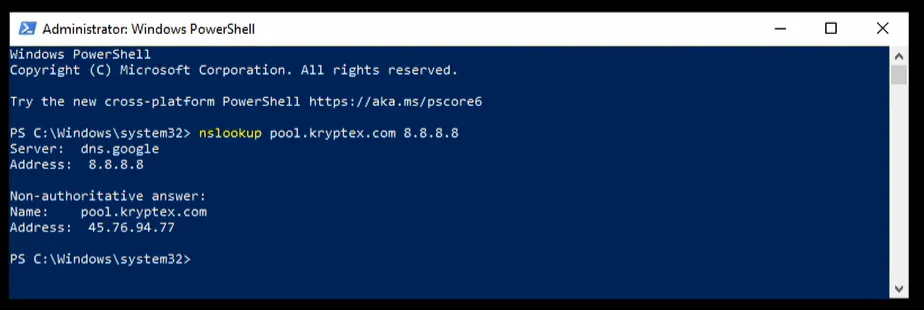
pool.kryptex.com — the resource you're checking availability for.
8.8.8.8 — the DNS server you're testing with.
If the command returns an IP address, the DNS works and resolves this domain.
If your ISP returns an error or wrong IP, but the DNS returns the correct IP address, changing DNS will solve the problem.
How to Check DNS Speed Before Changing Settings
Open Command Prompt (Win+R, type cmd and press Enter) or PowerShell, then run:
Measure-Command {nslookup pool.kryptex.com 8.8.8.8}

pool.kryptex.com — the resource you're checking availability for.
8.8.8.8 — the DNS server you're testing with.
Compare response times from different DNS servers and pick the fastest. The one with the lower millisecond value is fastest and should be your choice.
Changing DNS on Windows
Press Win+R, type control and press Enter.
Open "Network and Internet" → "Network and Sharing Center" → "Change adapter settings".
Find your active connection: "Ethernet" for cable or "Wi-Fi" for wireless. Right-click → "Properties".
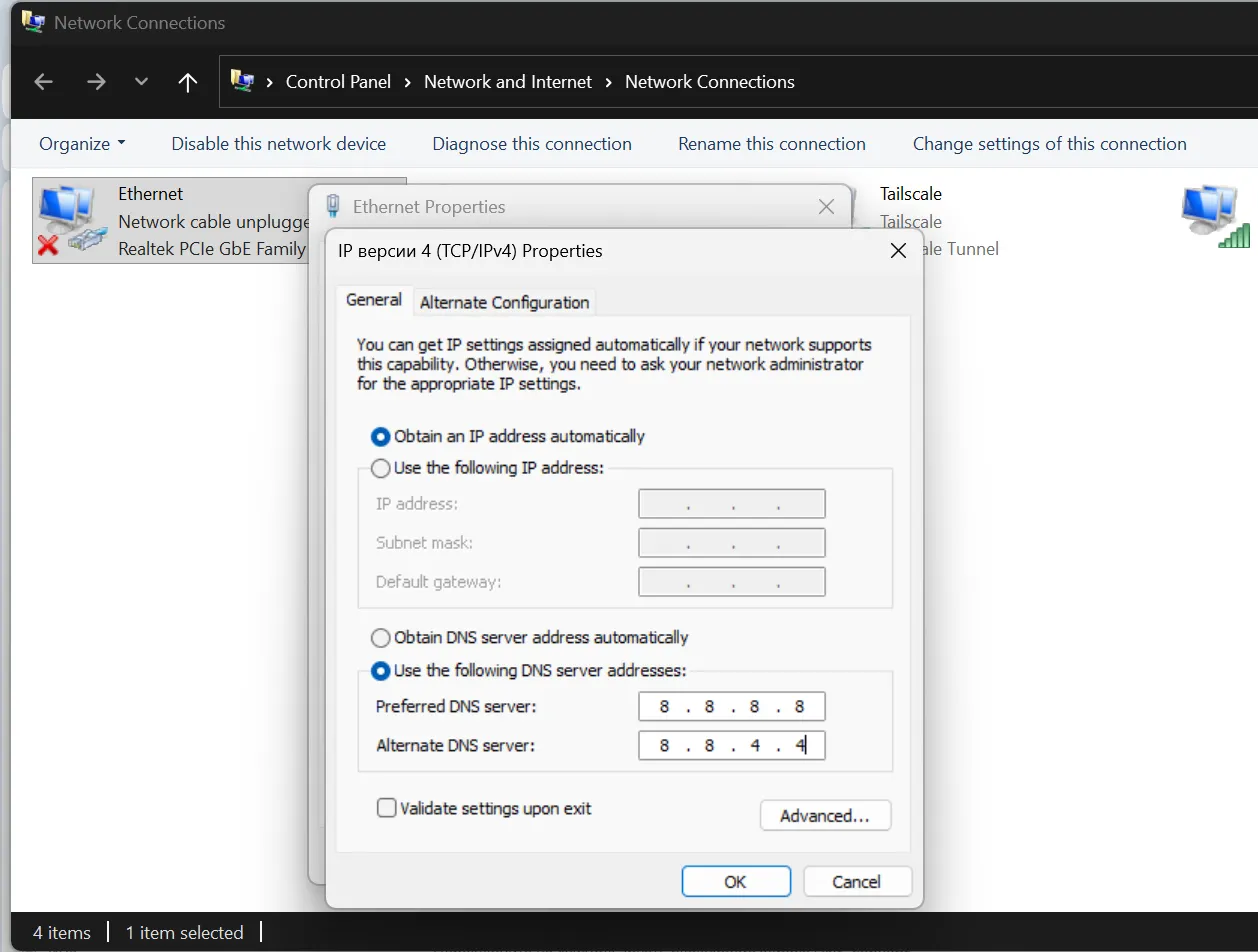
Select "Internet Protocol Version 4 (TCP/IPv4)" → "Properties".
Switch to "Use the following DNS server addresses" and enter:
- Preferred:
8.8.8.8 - Alternate:
8.8.4.4
Click "OK". Done.
Windows 10/11: Through System Settings
Press Win+I → "Network & Internet".
Select "Wi-Fi" or "Ethernet" → click your network name.
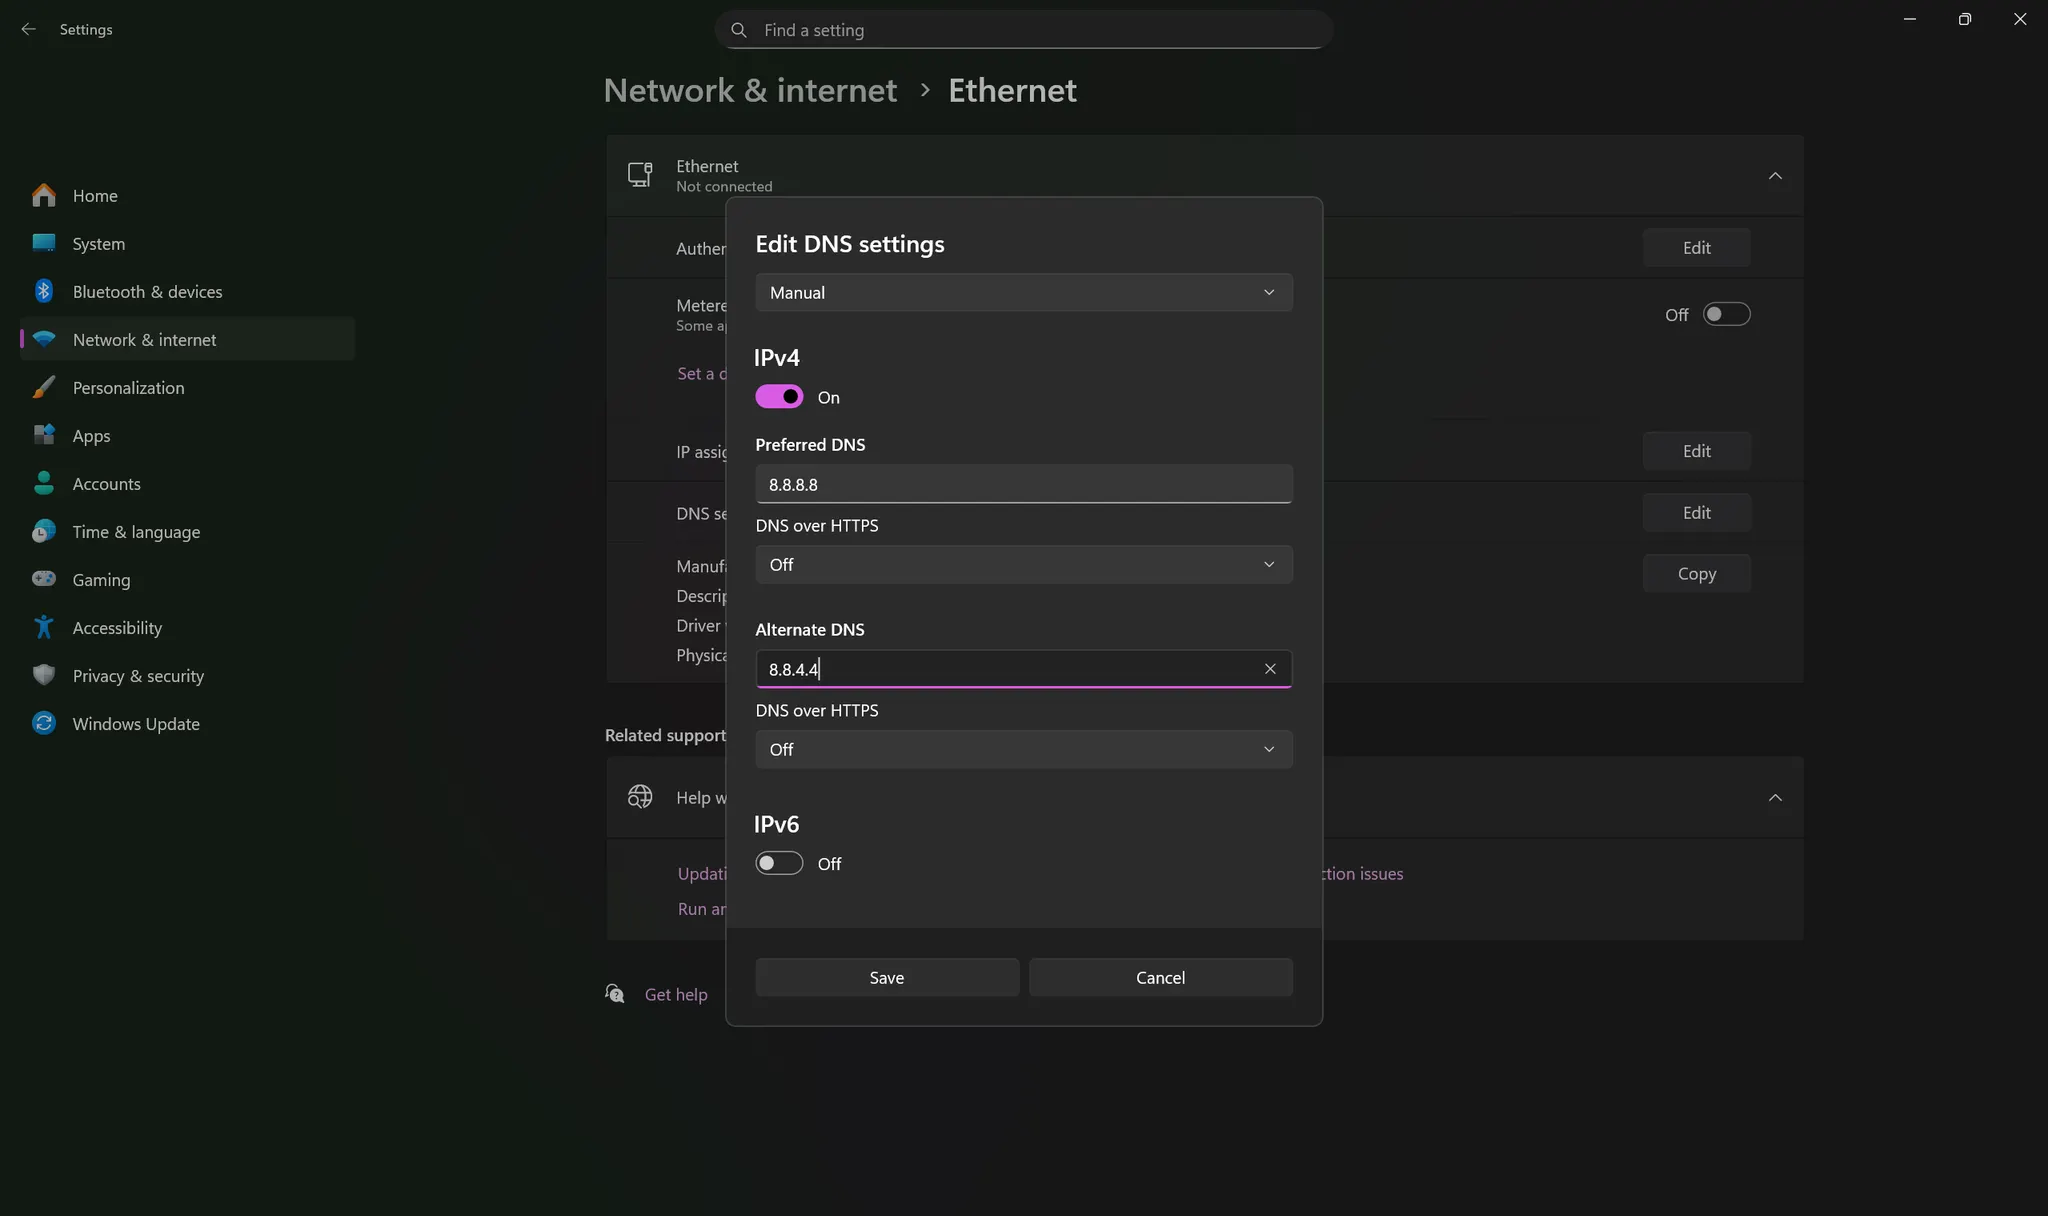
Find "IP settings" → "Edit" → select "Manual" → enable IPv4.
Enter DNS addresses:
- Preferred:
8.8.8.8 - Alternate:
8.8.4.4
Click "Save".
Changing DNS on Linux
Click the network icon in the top-right corner → "Network Settings".
Find your active connection → click the gear icon → open the IPv4 tab.
Switch DNS to "Manual" and enter addresses separated by commas:
8.8.8.8, 8.8.4.4
Click "Apply". Reconnect to the network.
Linux: Editing resolv.conf
Quick method, but settings reset after reboot.
Open terminal (Ctrl+Alt+T):
sudo nano /etc/resolv.conf
Delete old nameserver lines, add new ones:
nameserver 8.8.8.8 nameserver 8.8.4.4
Save: Ctrl+O, exit: Ctrl+X.
Linux: Permanent Setup via systemd
For modern distributions.
Open config:
sudo nano /etc/systemd/resolved.conf
Find the #DNS= line, remove # and add addresses:
DNS=8.8.8.8 8.8.4.4 FallbackDNS=1.1.1.1 1.0.0.1
Save and restart the service:
sudo systemctl restart systemd-resolved
Check:
systemd-resolve --status
Changing DNS in Router
The most convenient method: configure your router once — all devices at home automatically get the new DNS.
Open a browser and enter your router's address: usually 192.168.1.1, 192.168.0.1, or 192.168.100.1.
The address is on the sticker on the bottom of your router.
Log in. Default passwords: admin | admin or admin | password. If these don't work, check the sticker.
Find the "Internet", "WAN", or "Network" section. The exact name depends on the model.
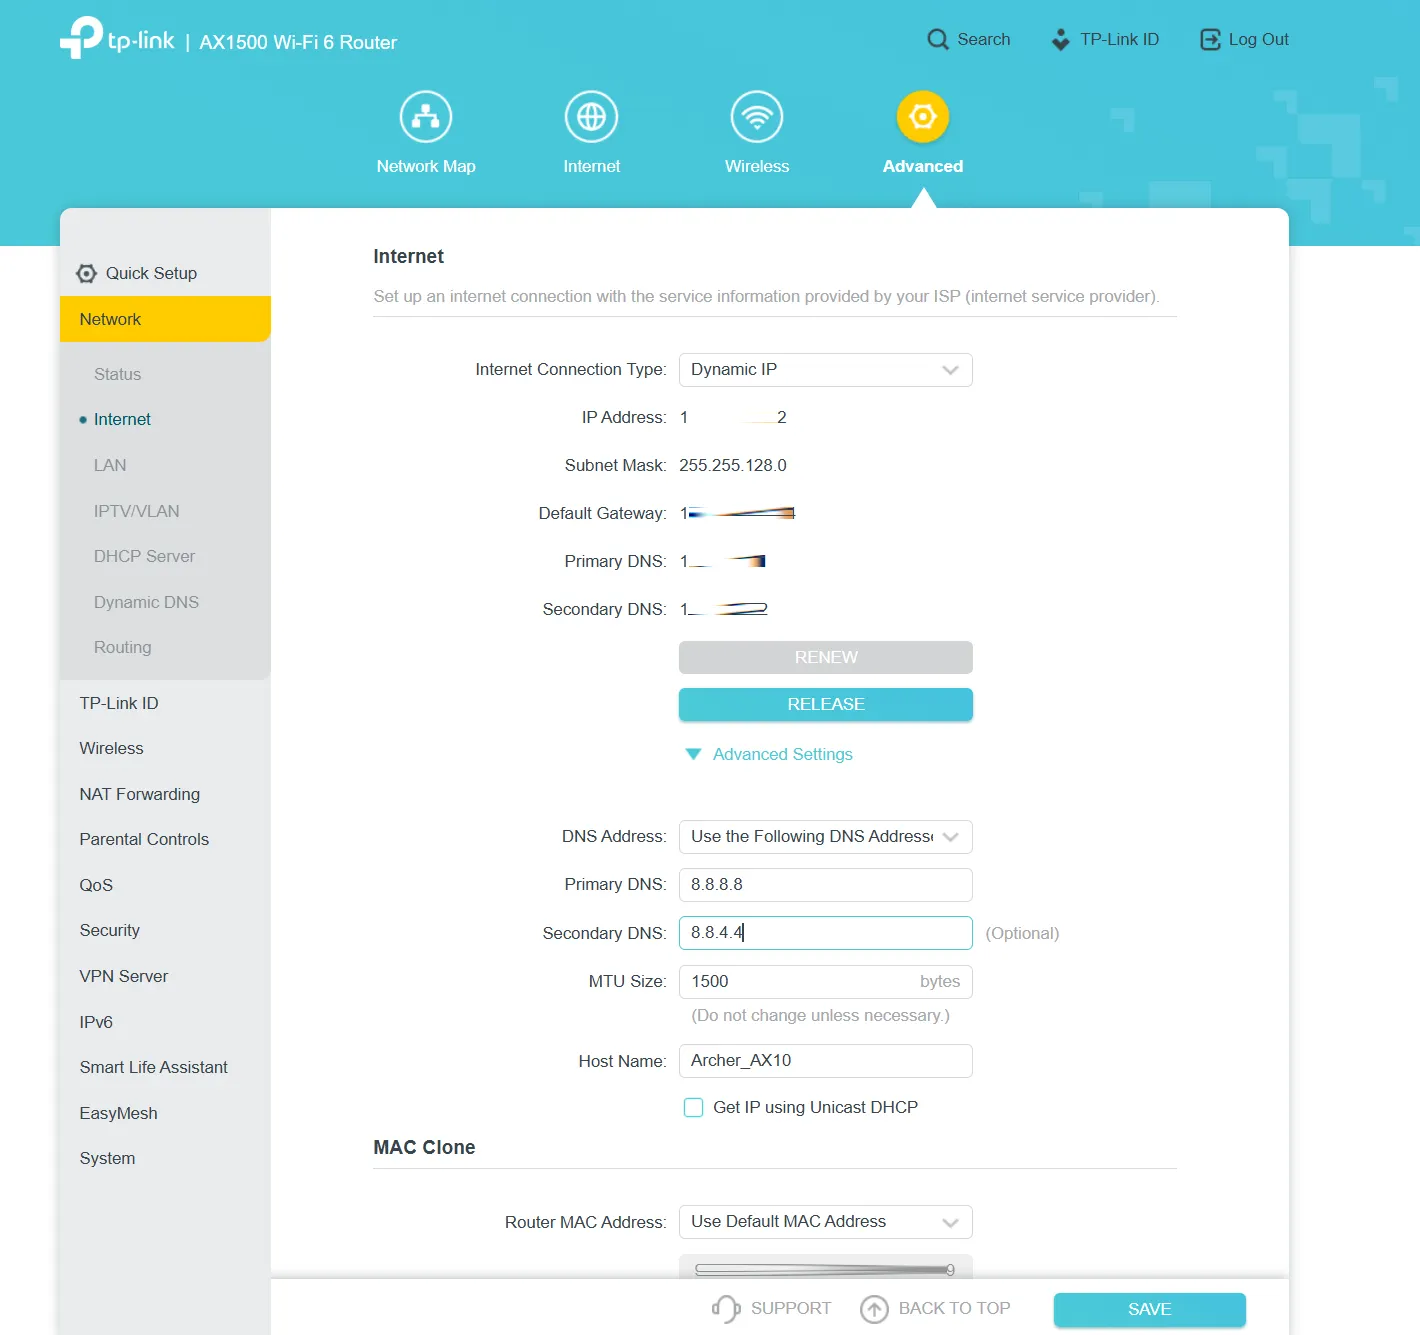
Find the DNS server fields. Uncheck "Obtain DNS automatically".
Enter addresses:
- Primary DNS:
8.8.8.8 - Alternate DNS:
8.8.4.4
Click "Save" or "Apply". The router will reboot — wait a couple minutes.
Where to Find Settings in Popular Routers
TP-Link: Network → WAN → DNS section
ASUS: WAN → Internet Connection → WAN DNS Setting → disable automatic
D-Link: Setup → Internet Setup → My Internet Connection
Xiaomi: Settings → Network Settings → DHCP Settings → DNS
Keenetic: Internet → Connections → select connection → IP Settings → switch DNS to "Manual"
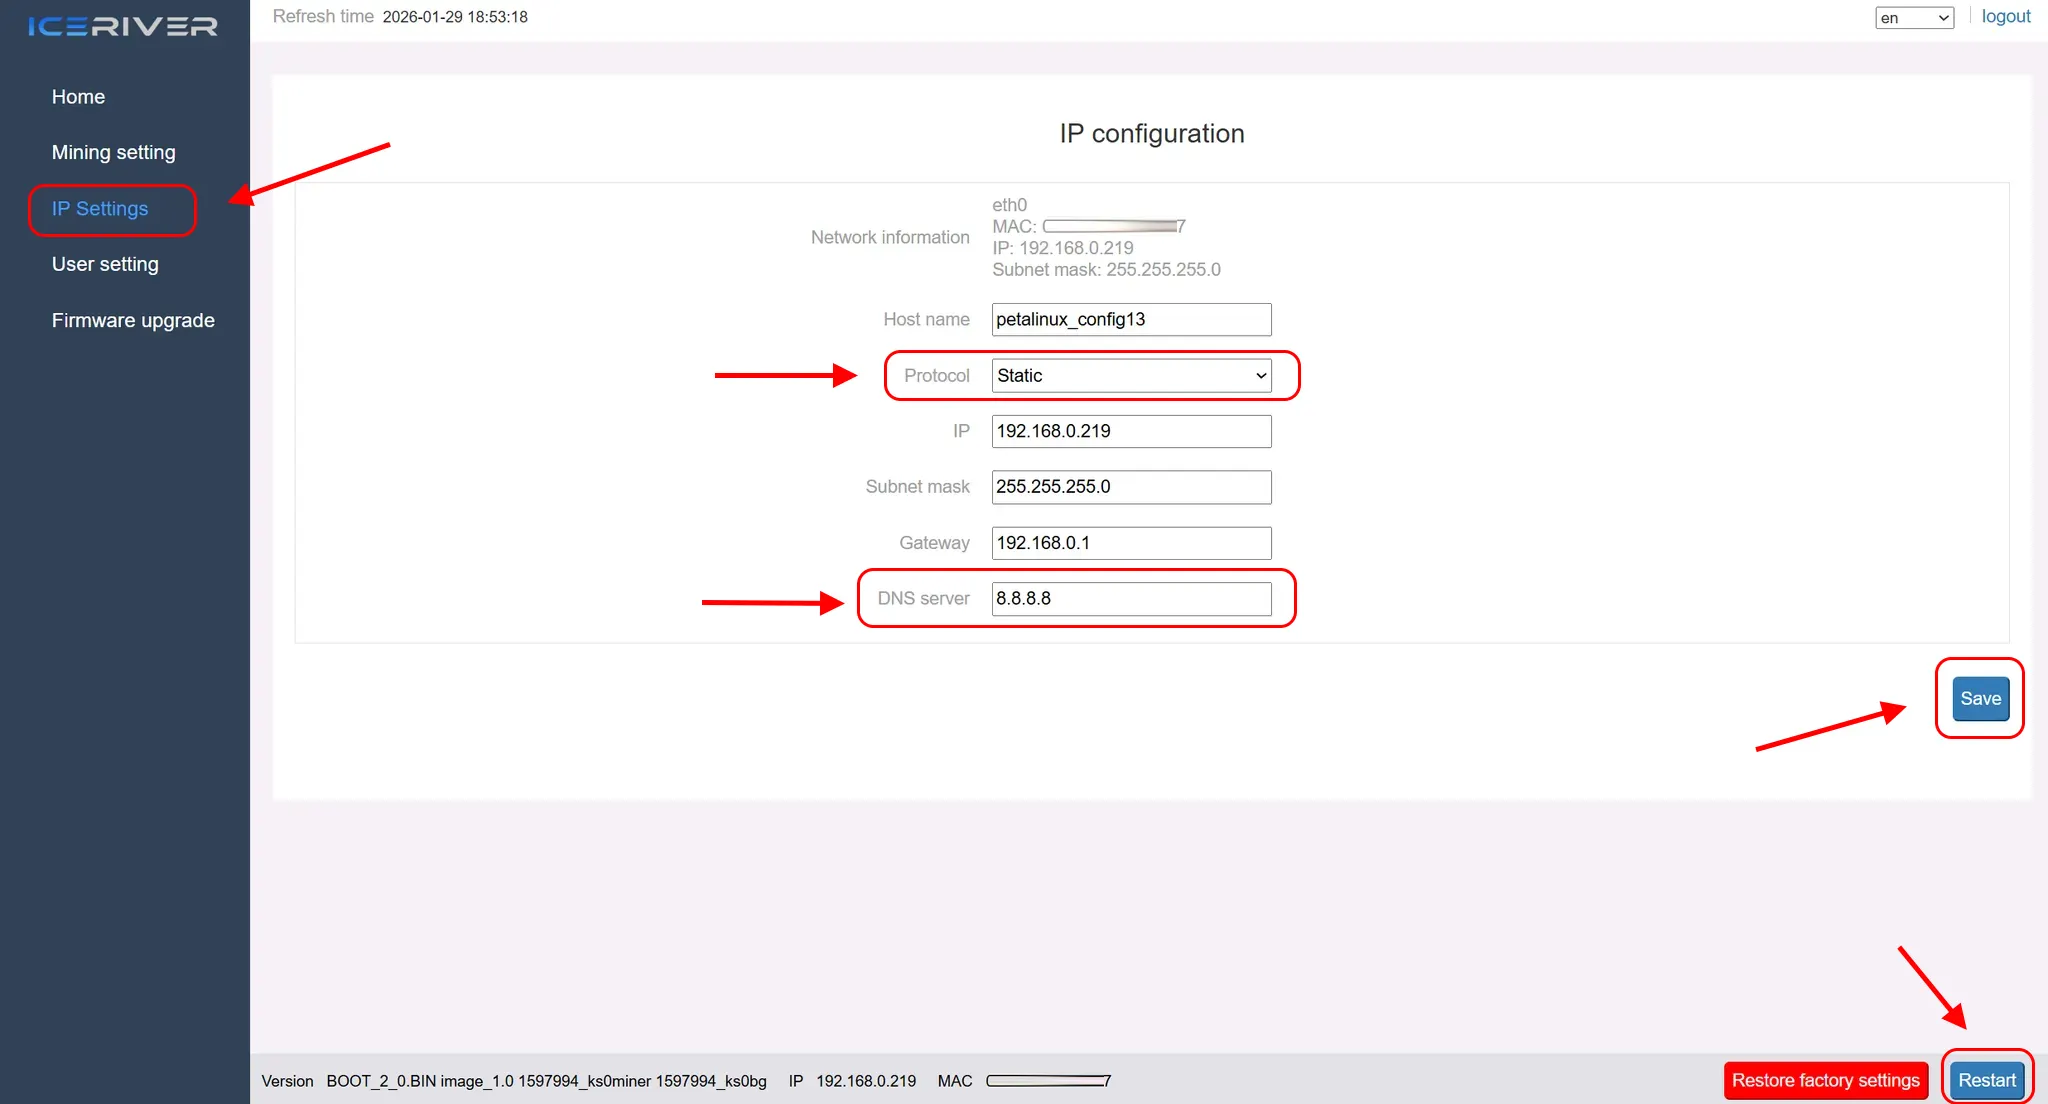
Changing DNS in ASIC Miner
ASICs are configured similarly to routers.
Find your ASIC's IP address. Log into your router and check the list of connected devices. Or use Advanced IP Scanner software.
Open a browser, enter the ASIC's IP address. Log in: usually root | root or admin | admin.
Bitmain Antminer
Network → find DNS Server → enter addresses in DNS1 and DNS2 → Save
Reboot: System → Reboot
MicroBT Whatsminer
System → Network Setting → switch DNS to Static → enter addresses → save → reboot
Innosilicon
Settings → Network → enter DNS Server 1 and DNS Server 2 → save
Canaan AvalonMiner
Configuration → Network → DNS Settings → enter addresses → apply
Checking That DNS Changed
Windows: Open Command Prompt (Win+R, type cmd and press Enter) or PowerShell, then run:
ipconfig /all
Find the "DNS Servers" line — it should show your addresses.
Linux: open terminal:
systemd-resolve --status
or
cat /etc/resolv.conf
Online: visit dnsleaktest.com — the service will show which DNS you're currently using.
Flushing DNS Cache
After changing DNS, flush the cache so old addresses don't interfere.
Windows (Command Prompt or PowerShell as administrator):
ipconfig /flushdns
Linux (depending on system):
sudo systemd-resolve --flush-caches
or
sudo /etc/init.d/nscd restart
Reverting Everything Back
If something goes wrong, enable "Obtain DNS server address automatically" in settings. The system will revert to your ISP's DNS.
Need Help?
Have any questions, something is unclear, or you can’t connect?
Contact support — we're happy to assist!
Email support at support@kryptex.com.